Modular Frame Facts 101
The NRS frame system is a marvel of simplicity and strength. The LoPro Fitting, cast in 356 aluminum alloy, is the heart of the system. Bolted into the ends of cross members and attached with a “coined” stainless steel U-bolt, it allows you to locate crossbars, seat bars, etc anywhere along the side rails.
The frame pipe is 1 5/8" outside diameter, 1 3/8" inside diameter. It is made of anodized 6061-T6 aircraft-grade aluminum for high-strength, long-wearing durability. We make the frames right here at our Moscow, Idaho facility, so custom modifications and special requests can easily be done for you.
In this series of photos, Matthew and Melissa set up a Fishing Raft Frame. They also add a Stern Seat Mount, an Angler Seat Bar Casting Platform, U-Shaped Thigh Bar, a Rear Casting Platform, a Rear “Y” Thigh Bar and a Raft Anchor Mount.
We’re showing you the assembly of the complete Fishing Frame, because it has the most parts of any of the raft frames. Putting this complete frame together will only take you an hour or so. Any of the other NRS raft frames will be even easier and quicker to assemble.
Frame Facts
The frames now feature our forged LoPro Fittings and Oar Mounts. Also, the Universal Seat Mount replaces the welded seat plate, allowing you to place a seat anywhere you want and custom adjust the seat angle.
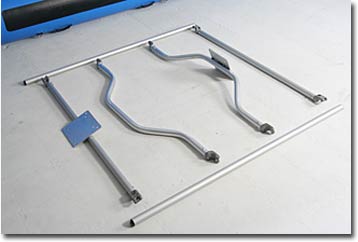
Basic frame pieces: side rails, seat bar, footbar, Angler seat bar and crossbar. Note: the crossbar in this setup will be placed behind the rower’s seat bar.
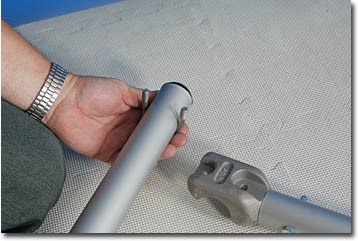
The heart of the system: the LoPro Fitting and the U-bolt that secures it to the side rail.
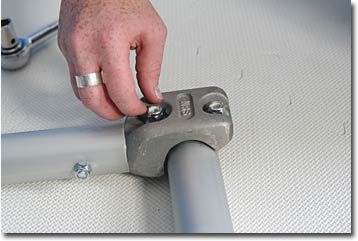
Washers and nuts in place. The ½" nuts have a nylon insert that makes them locking.
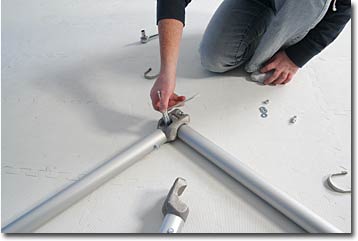
Your NRS frame comes with a handy Frame Wrench. Using a ratchet, with ½" socket, will speed up the assembly process.
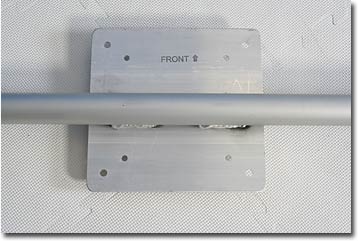
The seat plate on the rower’s seat bar is welded on with a slight forward tilt, so be sure the bar is attached with the “Front” labeled side facing forward. Note that the plate has two sets of holes. The Low-Back Drain Hole Seat attaches to the outer set of holes. The inner set fits the Angler Swivel Fishing Seat. We do not recommend the Angler Swivel Fishing Seat for use by the rower.

The seat plate on the Angler Seat Bar is welded on with no tilt, so goes on the side rails either way.

It’s easier to turn the frame over to mount the Padded Seat.
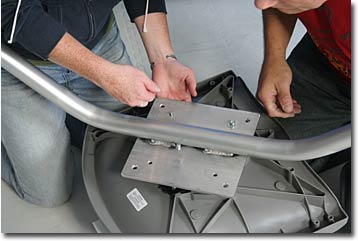
The Angler Swivel Fishing Seat mounts using the inner set of holes in the seat plate.
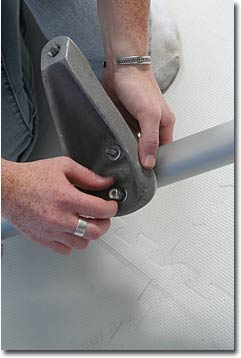
The NRS Oar Mounts are super burly, cast in 356 aluminum alloy. They also mount using the coined U-bolt. The term, “coined,” is used to describe the fact that the curved portion of the U-bolt is flattened, to prevent a wear point on the boat tubes. The location of the oar mount is personal preference, but most boaters find that locating the center of the mount 10–15" from the center of the seat bar LoPro gives good rowing leverage.
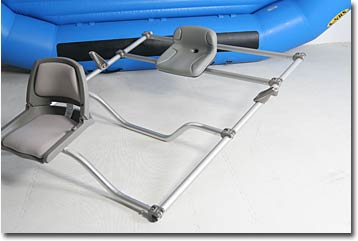
The completed NRS Raft Fishing Frame.
Adding the Stern Seat Mount:
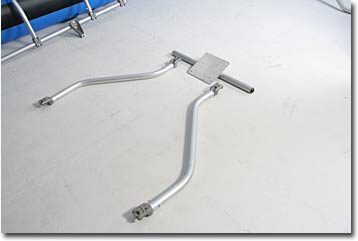
The frame pieces for the Stern Seat Mount. The Mount comes in two sizes: one for frame widths 60" and wider and one for frames narrower than 60". The length of the curved rails, from center of rear crossbar to center of the Mount seat bar, is 36" and 32", respectively. The seat bar should sit approximately in the center of the rear tube of your raft. If the distance from your rear crossbar to that tube center is outside that 36" and 32" range, we can bend you a custom length.
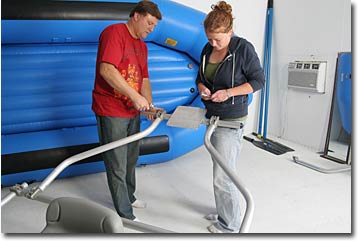
The angle of the curved rails and the tilt of the seat bar will be adjusted when you place the frame on the raft.
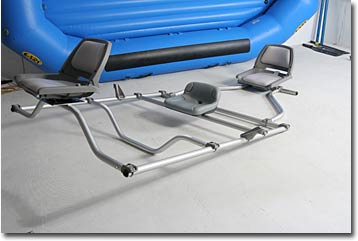
Frame with Stern Seat Mount and Angler Swivel Fishing Seat attached.
Adding the Angler Seat Bar Casting Platform:

When attaching the hanger bars to the LoPros on the platform itself, leave the U-bolts loose so you can adjust the angle and fit on the Angler Seat Bar.
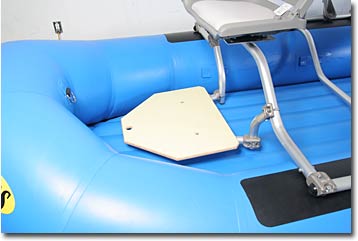
The Casting Platform mounted on the Angler Seat Bar. For extra stability, run an NRS HD Tie Down Strap from the hole in the end of the platform to the inside D-ring. If your boat doesn’t have an inside D-ring, you can either glue on a D-ring Patch or run the strap to a D-ring on the outside of the tube.
Adding a Rear Casting Platform:
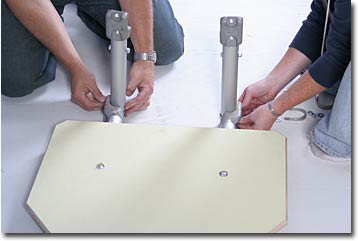
Attach the hanger bars to the LoPros on the platform itself.
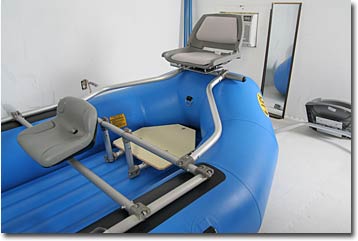
The Casting Platform in place. Again, run an NRS strap from the hole in the platform to a D-ring, or in this case, to the Stern Mount seat bar, for extra stability.
Adding a Rear “Y” Thigh Bar:
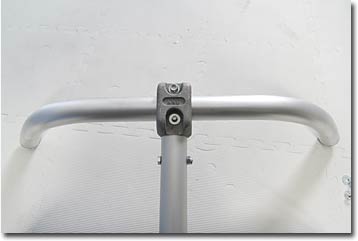
Attach the curved bar to one end of the vertical bar with LoPros on its ends. Note that the coined portion of the U-bolt faces the fisherman, for comfort when leaning into the bar.

The “Y” Thigh Bar in place. The orientation of the bottom LoPro will allow you to mount this thigh bar on a crossbar that is also being used to support a cooler or dry box. The bar can be tilted from the vertical, at the individual fisherman’s preference.
Adding a U-Shaped Thigh Bar:

The U-Shaped Bar fits on either side of the raised seat bar. This bar comes in two sizes, one for frames 60" and wider and one for narrower frames. You can also attach this thigh bar to a crossbar.
Adding a Raft Anchor Mount:

Start by removing the bolt that secures the LoPro on the right end of the footbar (right, as the rower is facing the front of the boat).
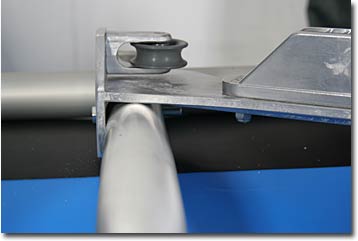
Replace that bolt with the longer one included with the Anchor Mount. Use it to secure the plate with the jam cleat and pulley.
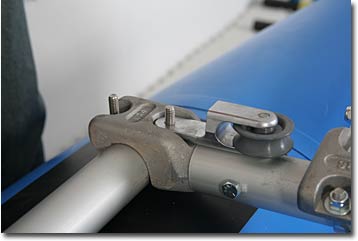
Remove the U-bolt from the LoPro on the right end of the rear crossbar and replace it with the included longer shank U-bolt. Attach the Intermediate Pulley Block to the inner leg of the U-bolt.

Attach the Anchor Mast to the Stern Seat Mount seat bar — just add rope and anchor! Our 3/8" polypropylene Rescue Rope works very well in this system.
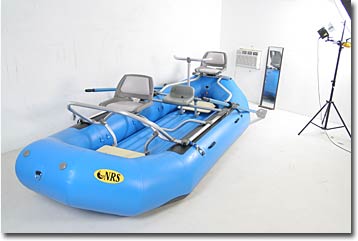
Your Deluxe NRS Raft Fishing Frame and NRS raft ready for hot fishing action!